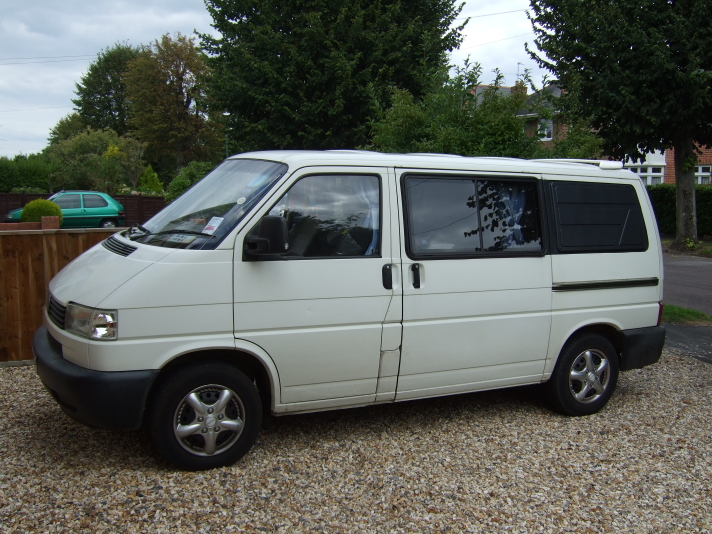


VW Transporter T4
DIY Campervan Conversion Instructions
Please note that these measurements are approximate and will need to be altered slightly to fit each van.
I would advise reading through all instructions and looking at the pictures before starting.
This makes a very cheap and comfortable camper with versatile space as you can see from the pictures.
| Outside | Side View (seating) | Side view (sleeping) | Rear view (seating) | Rear View (Sleeping) |
|
|
|
|
|
|
|
Steps |
Photos and Diagrams |
Instruction |
|
1 |
|
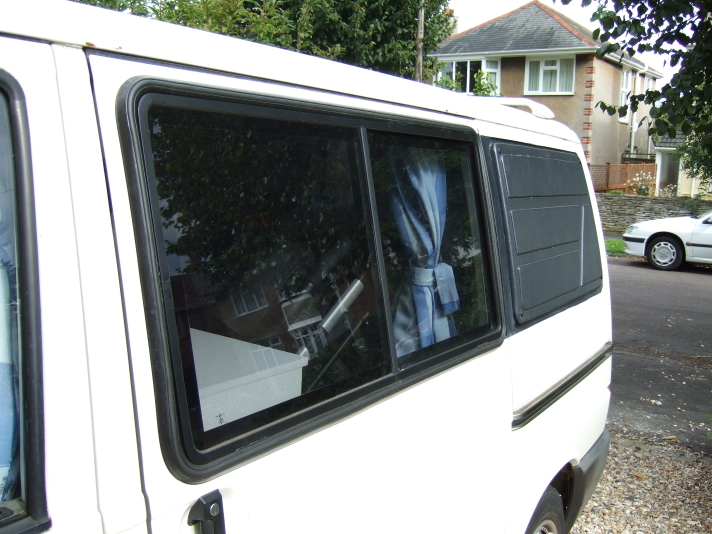
Windows Firstly you may like to install side windows. This is a job best left to professionals if you do not have the right skills. A number of companies can supply and fit these at reasonable prices.
|
|
2 |
|
Lining Next you will need to line the inside of your van. This is a simple job using three large sheets of plywood cut to size and fixed using self-tapping screws to the side wall bars and floor of your van. You might like to line this with cheap cord carpet available from discount carpet shops and fix using carpet spray glue.
|
|
3 |
Picture of the bed layout.
Full schematic see |
Seats - Overview Making the seats which will also form your double bed, is very simple. The T4 transporter cargo area is 2.4 meters in length, which neatly divides into four 600mm sections.
This allows [from behind the front seats] a rear facing double bench seat of 600mm, a gap of 600mm for a table, a forward facing bench seat of 600mm (which also has a 600mm backrest), and a rear deck of 600mm.
The main panels which form the seats are listed below in 1590mm widths. This is the full width between the side walls of the van at the height of 400mm which is correct in my van with a
The backrest is removable and fits between the front and rear facing seats (where the table will be) to form the bed. When the bed is made up, it is therefore 2.4metres long, which is great for a tall person.
|
|
4 |
Picture of the support timbers and truss clips |
Seat Supports Start making the interior firstly by fitting lengths of 112mm x 51mm (4x2 inch) timbers across the width of the van to support the seats, and attach using truss clips (available from DIY shops and builders merchants) to your side walls.
The tops of the timbers should be 400mm from the floor to give a comfortable seat height for a 6'2" person.
Working from the rear of the van, the centres of the timbers should be placed as follows:-
The first at 260 mm in (to support the back of the rear deck).
The second should be 600 mm in (to support both the rear deck and back of the seat base).
The third should be 1745 mm in (to support the front of the seat base, and base panel).
|
|
5a |
Full schematic see
|
Rear Deck Now you can install the base sections of your forward facing seats/bed.
You will need two sheets of plywood, cut to 600mm x1590mm x 18mm.
Screw one of these down onto the timbers to form the rear deck. You will need to cut off the two corners on the rear deck section to fit around the rear light panels.
|
|
5b |
Full schematic see
|
Seat Base We need to hinge the base of the seat to allow access to the storage area from inside the van. We will be installing a cupboard later over the left hand-side, so we need to divide the seat base into two sections to allow the main section to lift.
Cut the sheet of plywood into two across it's width at 410mm from the left hand side, and 100mm from the right-hand side. The 410mm and 100mm sections should then be screwed to the timbers and the 1180mm section should be attached to the rear deck using a piano hinge.
|
|
5c |
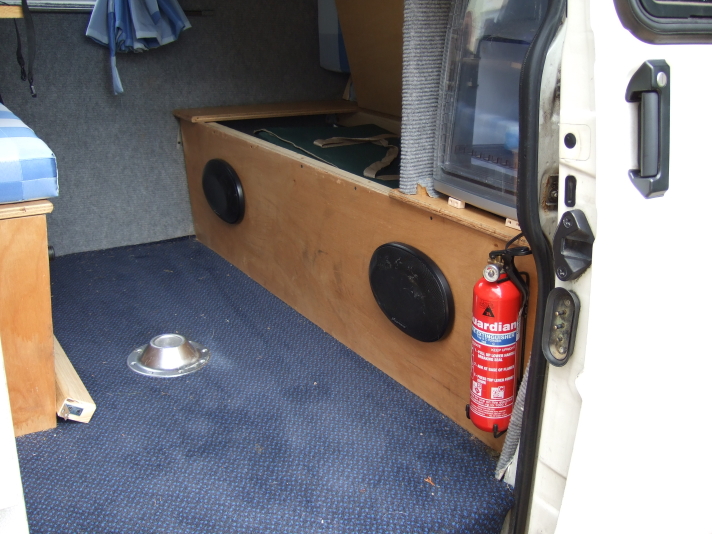
Seat front pictured fitted and with speakers installed |
Seat Front To fit the front, screw the fourth timber to the floor of the van, 1745mm in from the rear.
Screw the 400mm x 1590 x 18mm sheet of ply to the top and bottom joints, thus enclosing the storage area under the seats. |
|
6 |
Full schematic see
|
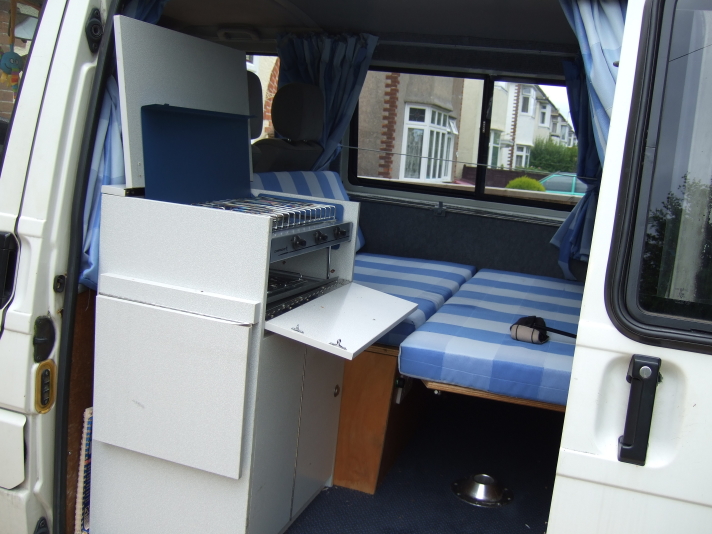
Rear Facing Seat Several options are possible here. You can either fit a full width seat or a 3/4 width seat which allows space for a cooker unit on the left hand side of the van. We like it here as you can stand outside the van and cook as well.
|
|
6a |
|
Full width rear facing seat To make this, you need to make a box seat as you cannot screw timbers to the side wall where the sliding door is. The dimensions are: Seat base: 1590mm x 600mm x 18mm Seat Front: 1590mm x 400mm x 18mm Seat back: 1590mm x 800mm x 18mm Seat sides: 560mm x 400mm x 18mm
The panels should be screwed together [and to the floor] using joint blocks . To use the seat for storage too, divide the seat base into two sections along it's length and join with a piano hinge. You will also need to support the underside of the piano hinge with another timber connected to the seat sides with two more truss clips. You will also need to divide the lifting part of the seat base into three sections width-ways to enable it to lift clear of the side walls of the van, so cut 100mm off each end and fix these to the seat sides and support timber. |
|
6b |
3/4 width seat
Full schematic see
|
Alternative 3/4 width rear facing seat Note: this is to accommodate a 565mm wide cooker unit (adjust yours to fit the cooker unit you have bought) Same as the full width seat but narrower! Dimensions are Seat base: 1120mm x 600mm x 18mm Seat Front: 1120mm x 400mm x 18mm Seat back: 1120mm x 800mm x 18mm Seat sides: 560mm x 400mm x 18mm
|
|
7 |
Larder and Fridge |
Cupboard - general This cupboard provides a small larder, space for a small fridge, and two storage areas. It fits over the left hand side of the seats. |
| 7a | See full schematic in Diagram 2 |
Cupboard Wall Firstly cut a section of plywood to the dimensions shown in the diagram (note the height of this may need to be trimmed to fit below the roof of your individual van)
Then fit a support rail (25mm x 51mm x 1000 mm) along the full length at 500 mm from the base.
|
| 7b |
 Cupboard shown in final position |
Cupboard Shelf
Fit a further support rail along the side wall of the van at 500 mm from the base
The shelf is a further sheet of plywood of dimensions 1060mm x 380mm x 18mm
Screw the shelf to the support rail on the cupboard wall.
Now lift the cupboard wall and shelf into position, whereby the shelf sits on the support rail on the side wall of the van. Fix to the side support rail using connecting blocks fixed under the shelf. Fix the cupboard wall to the rear deck and fixed section of the seat base using connecting blocks on the inside of the wall. |
|
7c |
See full schematic in Diagram 2 |
Cupboard Rear The rear of the cupboard is enclosed by screwing two further sections of plywood to the inside of the cupboard wall. |
|
7d |
See full schematic in Diagram 2 |
Cupboard Front The lower half of the cupboard is left open to allow the installation of a fridge. The top half of the cupboard is enclosed with a door cut into it. A section of plywood is used (see picture). |
| 8 |
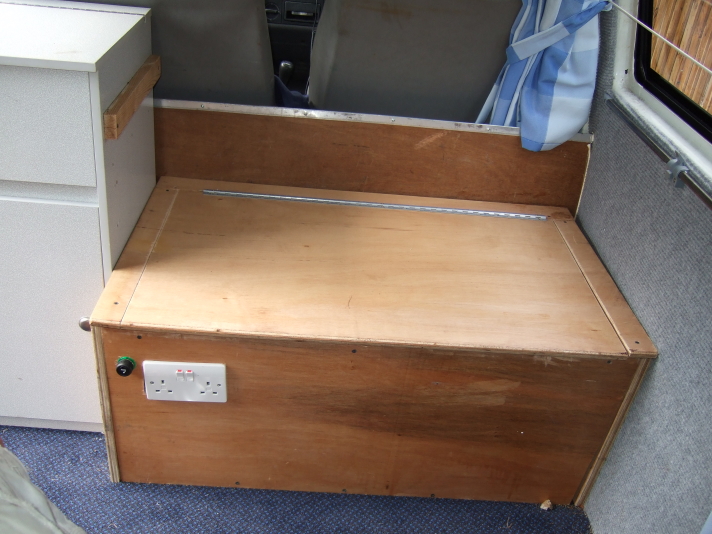
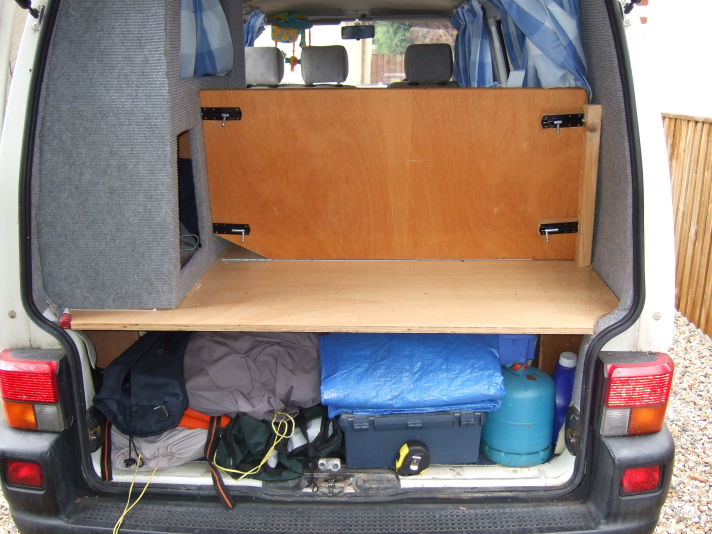
View from the rear showing forward facing seat backrest, and storage under the seats |
Forward Facing Seat Backrest Now that the cupboard is in place you can make the backrest. This is a sheet of plywood 1390mm x 600mm x 18 mm. This may need to be trimmed to fit your van. The bottom of the backrest sits just behind the piano hinge and is held in place by four gate bolts (pictured). You need to drill two holes in the side wall of the van and two in the side of the cupboard to hold it in place. |
|
9 |
|
Cushions Unless you're talented with a sewing machine, you will need to get seats upholstered by an expert, or get sections of foam cut to size and cover with a suitable material or throws. |
|
10 |
|
Curtains Again, curtains will need to be made to measure by an expert. The curtain rail track and runners can be bought cheaply from several suppliers |
|
11 |
|
Cooker units There are numerous options, and many of these come as flat-pack kits or you can make your own bespoke unit to fit your cooker of your choice. This one came from JustKampers |
|
12 |
|
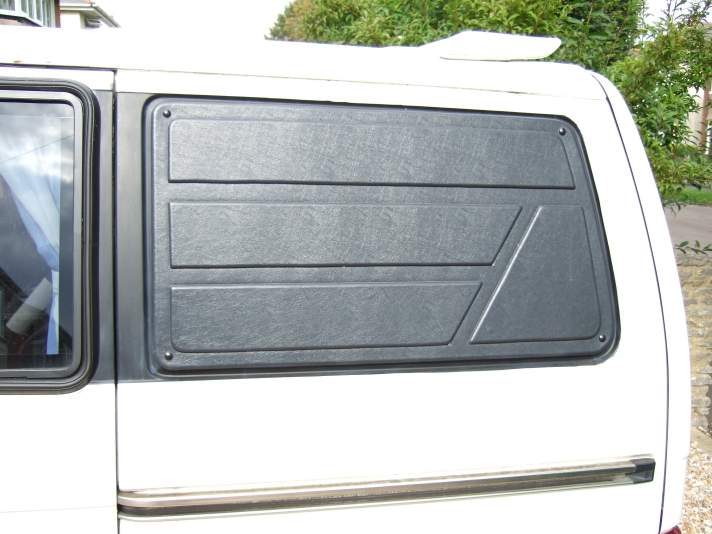
Rear window blanking panels If you have decided only to fit centre windows, you might like to fit plastic blanking panels for the rear sections on both sides. |
|
13 |
|
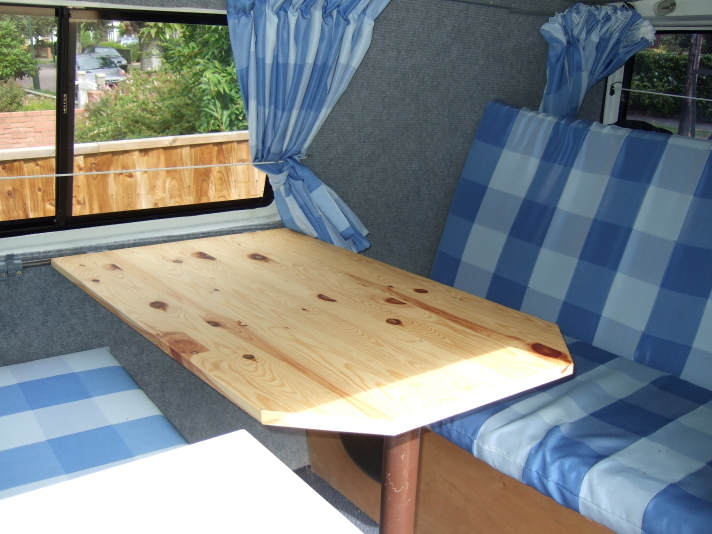
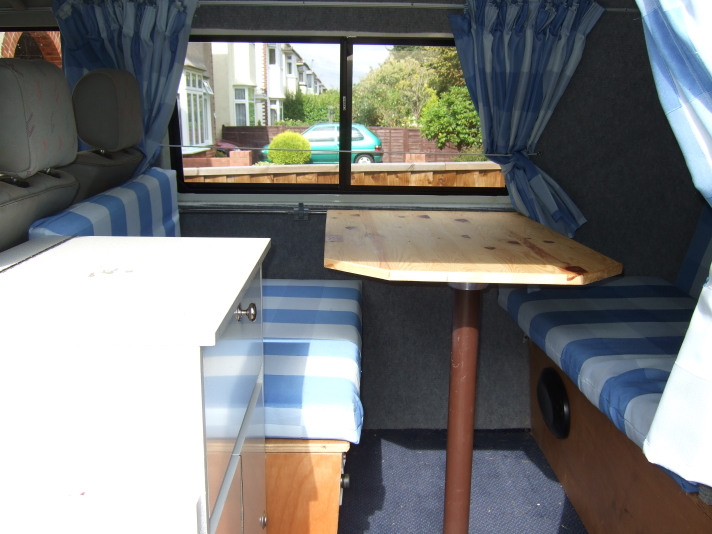
Table The table is made from a sheet of pine furniture board (dimensions for the 3/4 width layout are 1120mm x 600 mm x 18mm), fixed to a sliding rail on the right-hand side of the van, and supported with a standard table leg. Both the rail and leg are available from several motorhome accessory dealers.
|
| 14 |
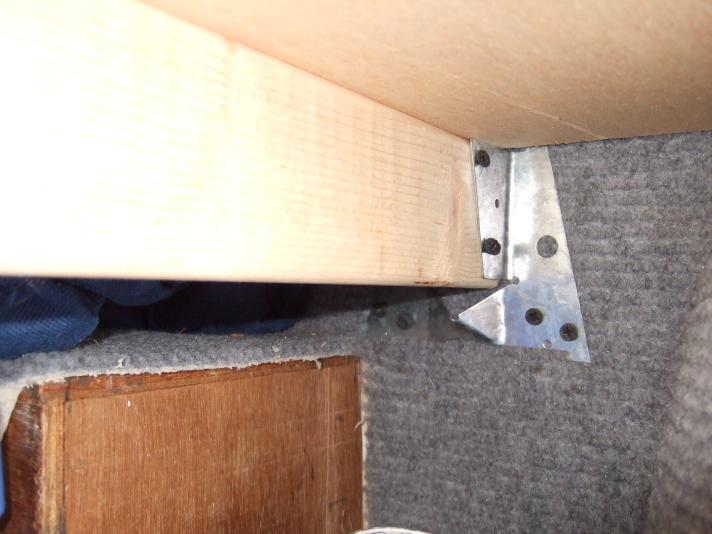
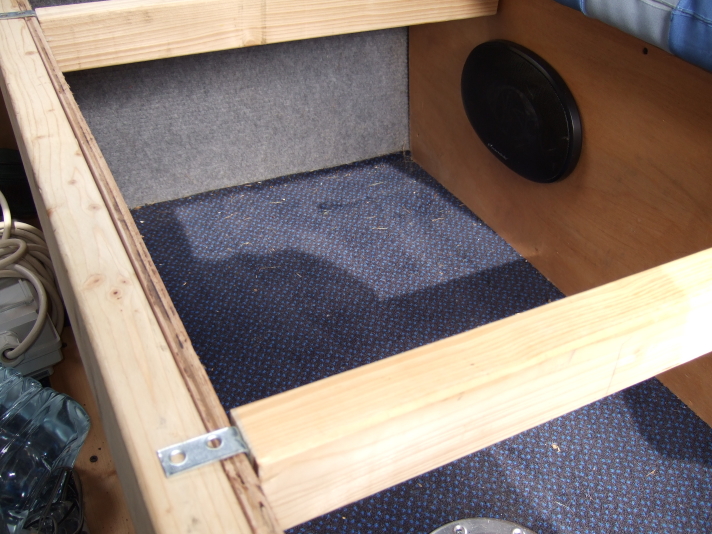
 Bed support rails
Showing L-brackets to hold supports in place |
Making the bed To make the bed, remove the backrest of the forward facing seat, and place in the gap where a table can go. As we have left a 600mm gap between the forward and rear facing seats it should fit perfectly.
To hold it in place you will need two support rails (pictured) with L-brackets on the ends to sit on the lip of the seat bases (under the lifting sections). This distance is approximately 640mm. |